

The holiday shopping season presents a huge opportunity for retailers to drive growth through holiday A/B tests. Websites have higher traffic than usual, average order values increase, and the conditions are ripe for big gains if you can take advantage.
In this article, we’ll be sharing eight tests you can implement to make sure your brand gets its share of the holiday revenue pie this year. But before jumping right in, let’s set the holiday scene with key considerations and review trends that we see coming up.
Key Points to Consider With Holiday A/B Tests
Each holiday shopping season is different, but there are some constants that your company should consider every year.
Code Freeze
This is a tactic that we see most brands implement in an effort to mitigate risk, and it makes a lot of sense. By not allowing any code changes on your site over the holiday season, there’s less risk of introducing a bug or customers encountering errors.
However, this also leaves little room for brands to maintain agility, implement new ideas or capitalize on any short-term campaigns. Having a solid client-side experimentation and personalization strategy can help you be more agile, make changes, and achieve better results during the busiest part of the year, while also not having to rely on development resources or change any code.
Understand Your Audience
Understanding your customer is obviously important any time of year, but it’s especially important during the holiday shopping season because customers behave differently.
Audiences this time of year are hoping to maximize savings, and they want a quick and easy checkout process. Understanding how customers behave during the holidays can help you as you improve your ongoing customer retention strategy.
Consistent Messaging
The holidays are a hectic time of the year, and there are countless opportunities to put your message out to the market. Ensuring consistency throughout any messaging that you test across multi-touch campaigns and various channels is important for a seamless customer experience – and helps to cut out unnecessary confusion that can detract from your presence in-market.

2022 Holiday Ecommerce Trends
The shopping season will be longer. Shoppers will search for deals earlier in the season and start spending earlier. The last few years of holiday shopping have been plagued by supply chain and logistics issues. Even though brands have made corrections in those areas, consumers still anticipate issues during the heavy rush of the 2022 season.
Mobile still holds strong. While mobile spending increased drastically due to COVID-19, mobile sales growth has evened out. It remains close to, if not exactly at, a 50/50 split with desktop shopping. Mobile users continue to use phones to quickly research products, even while in-store, which makes the user experience on mobile as important as ever.
Brands using optimization will win the lion’s share. Brands that use the holiday shopping period for testing are laying the groundwork for strategic UX improvements that will impact the customer experience long after the holiday season. Look for opportunities to use the increased holiday shopping traffic to your advantage.
BOPIS and BNPL gain traction. Buy online/pay in-store and buy now/pay later options are only getting more popular. The services provide an easier checkout flow and give customers the flexibility they need, especially with consumers keeping an eye on tight shopping budgets.
The bottom line? Companies that are able to build consistently sophisticated shopping experiences continue to lead, specifically by leveraging data and technological innovation.
By building a multi-layered approach that considers every interaction with the customer – including website and apps, in-store purchases, deliveries and direct-to-customer, payment methods, and innovations – you can distinguish your brand from the competition and gain important market share.
Now that you know the most important factors to consider when implementing holiday A/B testing, let’s dive into eight examples of tests you can run this holiday season to drive more profitable revenue for your brand without increasing your ad spend.
1. MeUndies Plays Up Promo Code Banners on Product Detail Pages
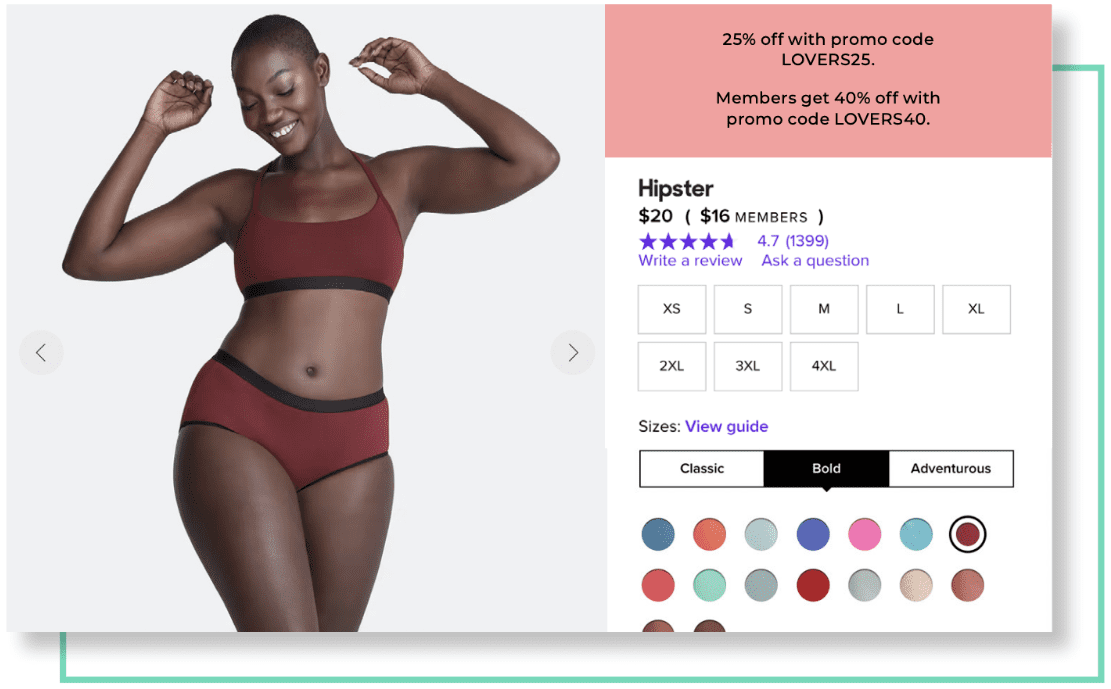
AB Tasty customer MeUndies ran a promotion on products for Valentine’s Day, but they also had traffic coming straight from product ads to the product pages, bypassing any mention of the promotion. The team added a banner widget to the product detail page (PDP) during the holiday period to inform visitors of active promotions since they may not have seen them on the homepage. The banner was then tested against the original page which had no reminder.
Holiday A/B Test Results: Higher Transactions & Clicks
By displaying this large, colorful banner at the top of their PDP and all relevant pages, MeUndies created more visibility around the promotions – no matter the visitors’ entry point to the website. This banner saw transactions increase by 9.8% with a 10% increase in clicks on the “add to cart” option!
On top of this, the brand saw an uplift of over $400,000 in revenue while running this experiment. Adding these eye-catching banners on your PDPs is a great way to grab attention – especially during periods when you’re anticipating higher traffic than normal so that your visitors don’t miss out on your special offers, like on Black Friday.
2. Kusmi Tea Tries Promo Code Gamification to Push Engagement
When high-traffic shopping seasons are fast approaching, testing your creative customer experience ideas ahead of time is a great way to determine how to drive engagement when it’s go-time.
For example, incorporating gamification into your site experience is an opportunity to offer something to your audience while keeping them engaged with your site.
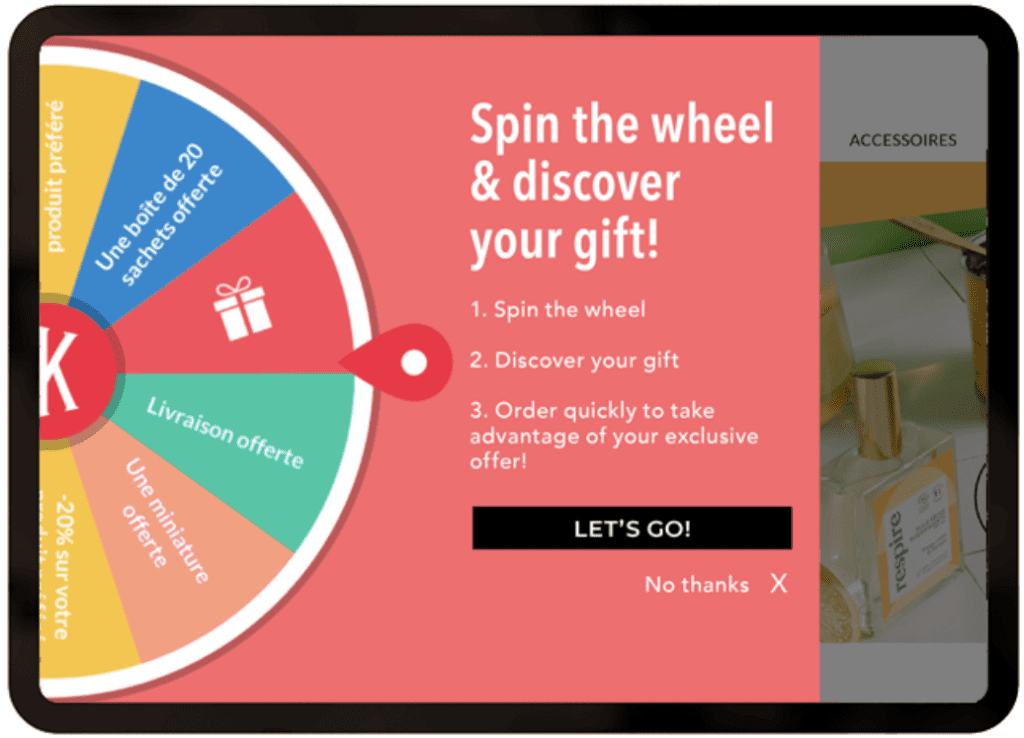
Hoping to spread a little joy during the holiday shopping season, Kusmi Tea implemented a prize wheel for all site visitors to boost engagement. Running the experiment at the same time as the launch of their Christmas shop allowed the team to capitalize on high traffic.
Holiday A/B Test Results: More Conversions & Lower Bounce Rate
Over the course of the experiment, 42% of site visitors engaged with the prize wheel, and Kusmi Tea saw a 2% increase in conversion rate among participants. The prize wheel game also helped to keep visitors on the site for longer with an 8% decrease in bounce rates for participants.
Their early success enabled the team to fully invest in the implementation by hard-coding the wheel into the back-end in time for the upcoming holiday season (and, of course, in time for the code freeze).
3. Frette Alters Navigation Bar With Most-Frequent Search Items
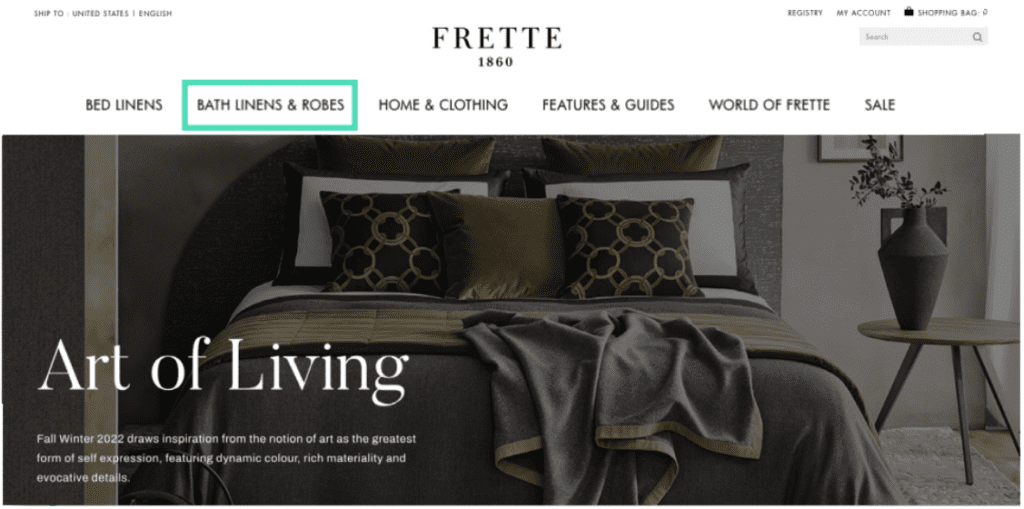
Italian linen brand Frette ran an A/B test aimed at refining UX and increasing traffic to certain pages. Noting that bathrobes were the top searched item on their site, Frette decided to modify their homepage navigation bar to clearly reference this item on a section header to streamline traffic to the popular product.
Holiday A/B Test Results: Increase in Clicks & Visits
By changing “bath linens” to “bath linens & robes” on the navigation, Frette saw clicks increase by 29% to the modified category and visits increase a whopping 102% to the bathrobe pages!
4. NYX Boosts Click-Throughs With the Number of Products Sold
Creating a sense of urgency to incentivize purchasing has long been a pillar of retail, with time-sensitive offers, last-chance messaging, as well as direct callouts for customers to “hurry” in-store or online.
Product pages on retailer sites are the perfect place to replicate this sense of urgency online.
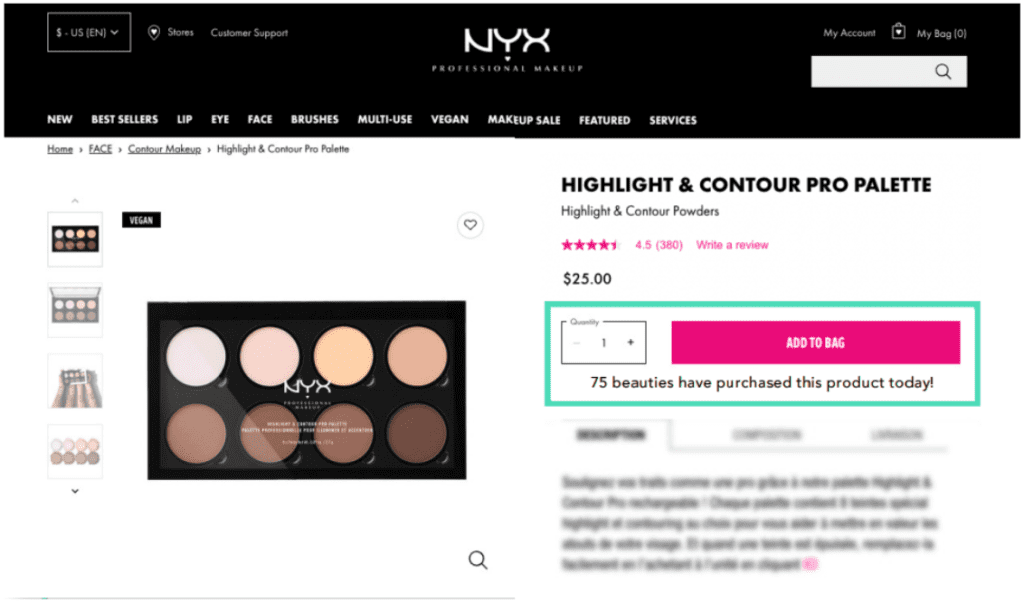
Cosmetics company NYX wanted to test these effects of social proof on their ecommerce site. They designed a simple A/B/C test for desktop visitors, running two variations of social proof text alongside the CTA on their product pages. The first variation indicated the number of units sold that day, while the second indicated the number of times the product had been viewed.
Holiday A/B Test Results: Lift in Click-Through Rate & Transaction Rate
Compared with the original page, which carried no social proof messaging, both variations improved clicks and transactions and reduced bounce rate. Of the two, the version that focused on purchases as opposed to views was more impactful, increasing the click-through rate by 43% and doubling the transaction rate!
5. Pets at Home Activates Return Intent Pop-Up for Existing Baskets
While adding products to an online shopping cart is certainly a step in the right direction through the purchase funnel, it is not a done deal.
Visitors have ample opportunities to change their mind, or they could simply get distracted and abandon their cart without submitting the purchase. On the flip side, this also leaves ample opportunities for you to optimize the purchase funnel on your site, to push prospects farther into the funnel and ultimately toward conversion.
Here’s an example of how you can give your customers an appropriate nudge at an appropriate time to reduce overall cart abandonment.
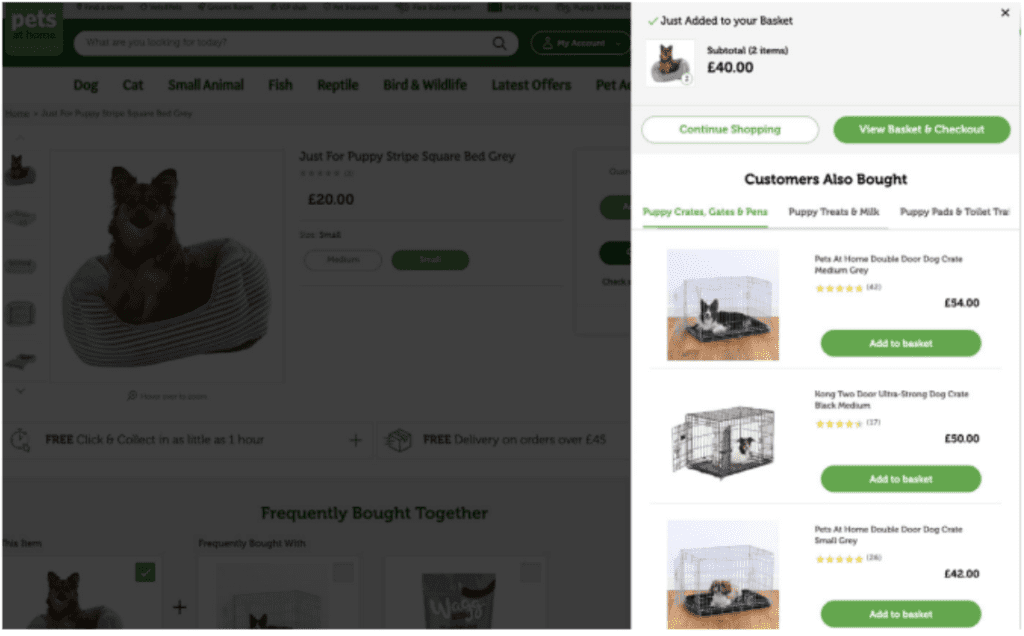
Pets at Home is the UK’s largest pet-care business, selling food and care items, grooming, and veterinary care services. Their site analysis indicated a high cart abandonment rate, and the team wanted to push more visitors beyond the basket page all the way through checkout.
To fix this, they built a pop-up that targeted returning visitors, displaying the user’s existing basket items. Reminding visitors of the items they’d already selected then helped encourage the visitors to proceed with their purchase.
Holiday A/B Testing Results: Increase in User Visits
The test ran for three weeks for all desktop users with at least one product in their basket. This simple pop-up test resulted in a 3% increase in users reaching the basket page and a 2.5% increase in users reaching the confirmation page. Pets at Home was able to validate their test with a positive outcome and then duplicate it on their mobile site as they continued their UX optimization journey.
6. Kiehl’s Offers Giveaways to Drive Higher Average Order Value
Maximizing total revenue is always the overarching goal for businesses in the ecommerce space. One way to achieve this goal is to attract more customers. Another way is to encourage customers to spend more when they shop.
Incentivizing purchases using promotional offers that reward a minimum spend through offers like discounts, gift-with-purchase, or free shipping can be a great way to grow your average basket size.
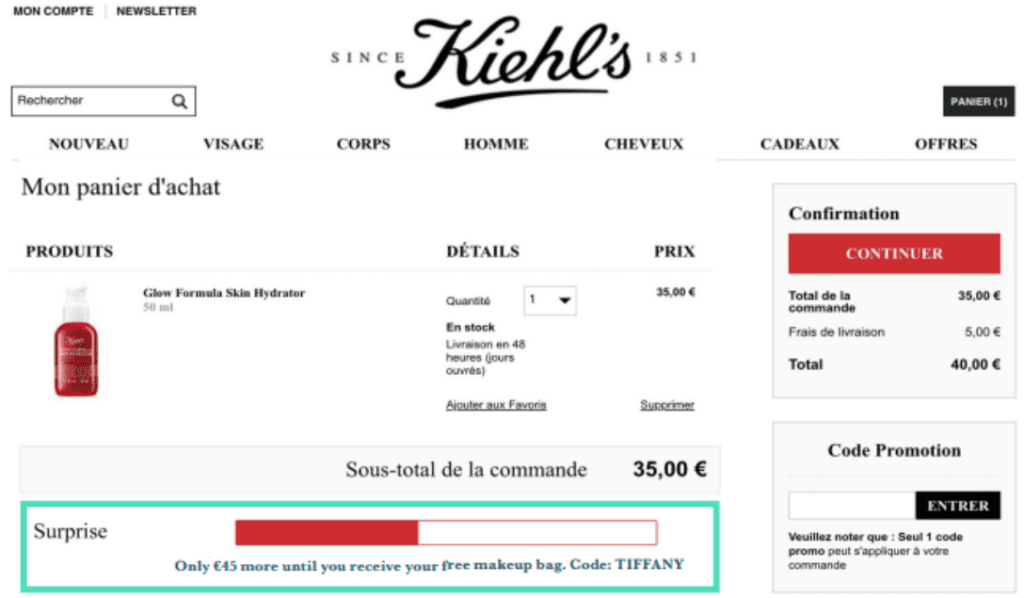
Here, Kiehl’s wanted to test a visual gauge on the basket page that clearly indicated how much further the shopper had to go to reach the threshold and unlock their gift.
Holiday A/B Test Results: Higher Average Basket Value & Growth in Clicks
Kiehl’s customers were particularly receptive to this visual progress tracker towards their gift with purchase. The test resulted in a 7% increase in clicks to the “continue” CTA and a 5% increase in average basket value.
The offer was a win-win! Not only did the brand increase the average order value but they also strengthened loyalty by rewarding shoppers with an exclusive Kiehl’s-branded gift – building the kind of goodwill that ensures consumers keep coming back.
7. Calvin Klein Adds Fixed Search Bar for Mobile Visitors
Helping your customers find what they’re looking for when they land on your mobile site is key to ensuring they stay on your site and shop with you. But space limitation on a mobile browser makes it difficult to display a full suite of products, and a confusing site interface can result in a high drop-off rate and missed conversion opportunities.
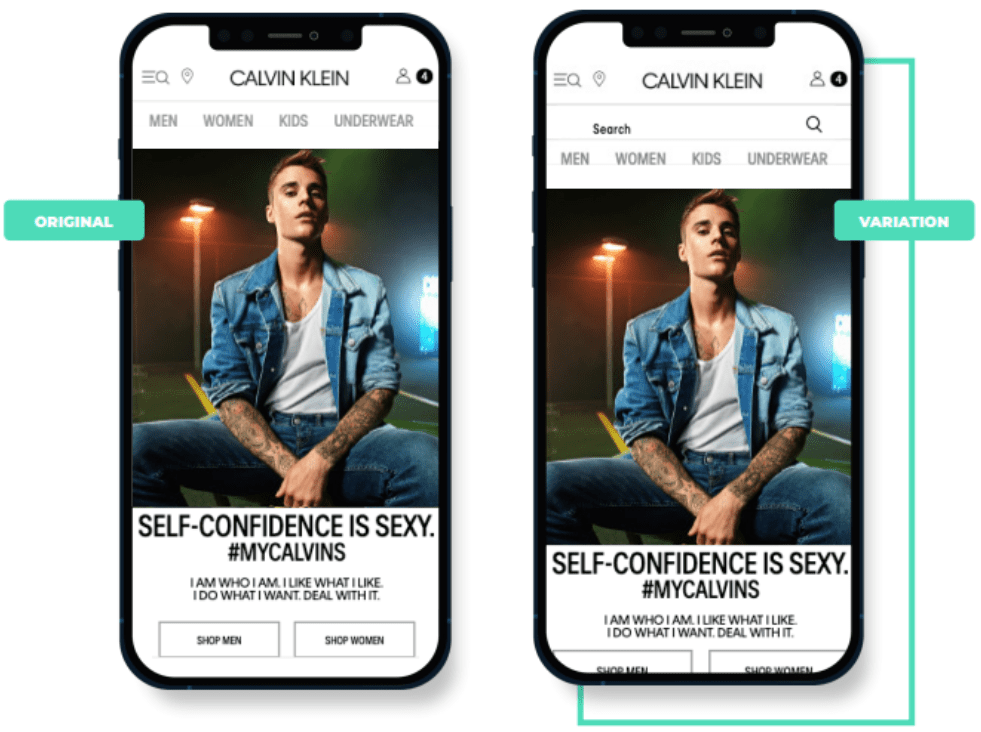
With product lines across men’s, women’s, and kids in clothing, underwear, swimwear, and accessories, Calvin Klein customers can be overwhelmed with choice and a dense browsing experience. The team was eager to see if driving visitors to a search function would optimize efficiency on the site.
Holiday A/B Test Results: Growth in Clicks & Visits
Their A/B test of a fixed search bar proved a big success, with a whopping 267% increase in search bar clicks and a 19% increase in consumers accessing the search results page. Implementing a sticky search bar for mobile browsing could be a great way for you to drive transactions and revenue on your own mobile site.
8. Galeries Lafayette Eases Checkout With Simple Payment Options
Today’s customers want flexibility and a quick, frictionless shopping experience. The payment process has become a key focus area for brands to eliminate friction for customers completing a purchase.
Payment methods generally come with a two-factor authentication requiring customers to confirm their identity. For some, this represents an unnecessary time-consuming step, especially during peak shopping periods when items sell out fast.
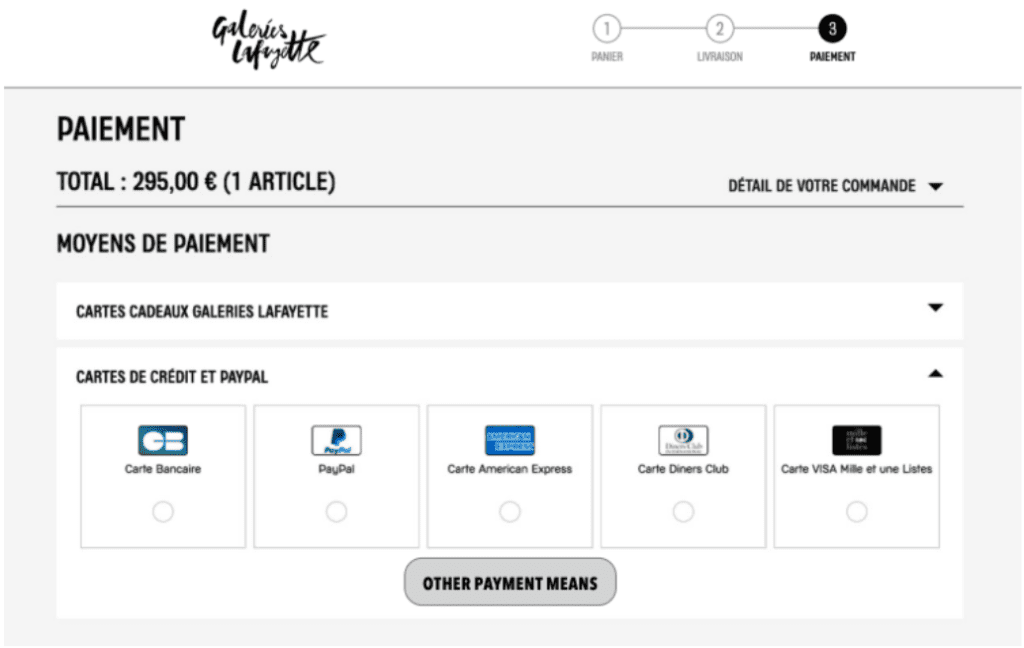
Galeries Lafayette, an upscale department store chain in France, hypothesized that this extra authentication step was deterring customers from completing their purchases. The team set up a test displaying payment methods that did not require double authentication, including the French bank card, PayPal, and American Express. They also introduced a CTA for “other payment means,” which did require double authentication.
Holiday A/B Test Results: Conversion Rate & Profit Increase
Their hypothesis was correct: The payment methods where no double authentication was required had a higher click rate and resulted in a conversion rate increase of 38% with a potential increase in profit by €113,000 ($109,935)! By identifying points of drop-off, brands can redesign the checkout process based on their customers’ behaviors.

Tying It All Together: Holiday A/B Testing
One of the most crucial factors in A/B testing is executing tests that provide actionable results. In fact, the industry average win rate for A/B tests is just 12-15%, meaning that the average A/B test yields a winner just 12-15% of the time. On the contrary, the conversion rate optimization experts at ROI Revolution have an A/B test win rate of 42%!
ROI Revolution partners with AB Tasty to help brands build better user experiences and discover untapped opportunities for profitable growth. AB Tasty is an A/B testing platform that empowers brands to build better end-to-end experiences, drive growth across channels, and deliver seamless user experiences to make happy customers. Reach out to ROI today to explore how we and our partners at AB Tasty can help your brand drive revenue at a high return by leveraging A/B testing.
Looking for more ideas for holiday A/B testing? Look no further than A/B Tasty’s e-book, 30 Black Friday Tests: How to Win Big During the E-Commerce Holiday Season. You’ll uncover even more inspiration for holiday A/B testing ideas for your brand.